Showing posts with label knit. Show all posts

12 March 2026

Adventures in Hanging Towels in Christmas Colors

Today's edition of Tabi's Creating Adventures is highlighting Christmas themed hanging towels. These lovely gems are a simple pattern and worked up nicely. Stockinette stitch knitting is probably my favorite stitching pattern. I do enjoy lace quite a bit, but there is something about stockinette that is amazing in its simplicity. I like the look, I like the feel, and stockinette is among the basics of knitting.


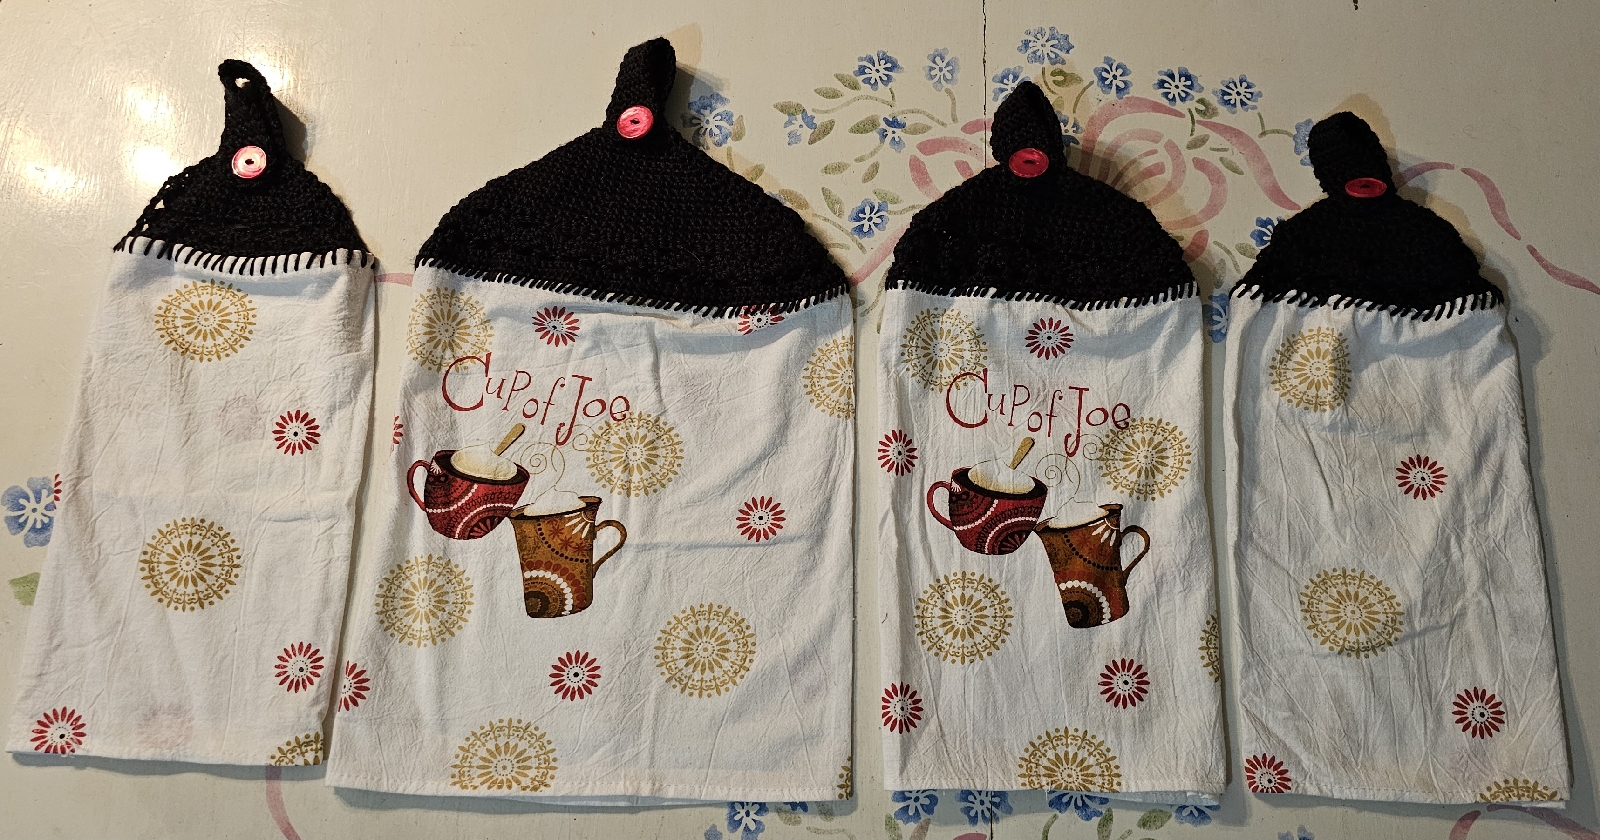
Above: A set of four hanging towels, alternated, make a nice visual.


Above: the red hanging towels are lovely by themselves.

Below: the green with red hanging towels have a masculine charm.


Above: Traditional red, green, and white hanging towels are a festive option.
 
Below: Sometimes you just need a special theme. These blue, red, and white snowmen are perfect for a fun Christmas (or winter) addition. 


I hope you enjoyed this little installment!


Blessings and Peace!
Tabitha

Tabi's Creating Adventures


If you would like more information, feel free to connect with me at one of the mediums below:

TabisCreatingAdventures@gmail.com

www.facebook.com/TabisCreatingAdventures

tenacious141b (Instagram)

https://payhip.com/TabiElrod  

22 March 2024

Adventures in a Lace Scarf

Today's edition of Tabi's Creating Adventures focuses on a lace scarf. It's absolutely beautiful and the picture here does not do it justice. I enjoy working lace, so this was a nice project to satisfy the lace embrace. My only regret is the yarn I used was a specialty or novelty yarn and it ended up being scratchy in the finished product, which was a surprise to me. I really thought it would be soft when it was finished.

On a side note, I am trying to figure out how to get my pictures to show up correctly in the blog. This one is sideways and I'm not sure what happened.

Blessings and Peace!
Tabitha

Tabi's Creating Adventures


If you would like more information, feel free to connect with me at one of the mediums below:

TabisCreatingAdventures@gmail.com

www.facebook.com/TabisCreatingAdventures

tenacious141b (Instagram)

https://payhip.com/TabiElrod  

19 December 2023

Adventures in Knit Hats... for Me!

Welcome to another installment of Tabi's Creating Adventures! Today we're looking at hats! 

I had some yarn I had bought years ago, when we lived in Washington state, and finally decided to use it. Both of these yarns were novelty handmade yarns and I only bought one skein of each, so that limited me on what I could make. With that in mind, and a new knit stitch pattern book, I worked up these beauties.


These were fun little projects. In the end, I decided to keep them for myself. After all, I did buy the yarn for me.

Blessings and Peace!
Tabitha

Tabi's Creating Adventures


If you would like more information, feel free to connect with me at one of the mediums below:

TabisCreatingAdventures@gmail.com

www.facebook.com/TabisCreatingAdventures

tenacious141b (Instagram)

https://payhip.com/TabiElrod  

15 December 2023

Adventures in Hanging Towels

Happy New Year! Welcome to another installment of Tabi's Creating Adventures!

Today we're enjoying some coffee... er... at least we're looking at some coffee decorated tea towels. Eh, take a look!


So, these bad boys were not quite what I expected. I pulled the towels out of the box and opened them up, and they were not the size I was expecting. They were much wider, and the coffee logo was not centered. In the end we have 4 different work-ups of the same color and pattern scheme. I don't think I'll call these a set, but if someone wants all four, awesome!

As for process, I cut each towel in two (like usual) to make four towels, then I elected to sew the top seam allowance on the sewing machine to make the anchor stitches more secure (I find it helpful). Next, I simple stitched with a wide embroidery needle (it looks like a sewing needle and works to thread yarn through fabric). Finally, crochet! Finishing touches include adding the functional buttons and weaving in the ends of the yarn. 

I experimented with how to fold the towels for the crochet part so they look nice and are usable. At least two of them were folded into quarters before I set the base stitches (with the embroidery needle), and the widest one is folded into almost thirds.

I hope you enjoyed this post!


Blessings and Peace!
Tabitha

Tabi's Creating Adventures


If you would like more information, feel free to connect with me at one of the mediums below:

TabisCreatingAdventures@gmail.com

www.facebook.com/TabisCreatingAdventures

tenacious141b (Instagram)

https://payhip.com/TabiElrod  

25 July 2023

Adventures in Socks

Happy Adventuring!

Not too long ago I made house socks for St. Jude in a Facebook based knitting challenge. I had a couple of wonderful people donate to the fundraiser and each received a pair of socks in thanks. I still have two of the four pair of socks I finished for that fundraiser: the purple pair from the top picture and the multicolored pair from the second picture.


I had intentions of making several more pair, however life happened and things got busy. I still plan to make socks and donate a portion of the proceeds to St. Jude. I am also considering partnering with a local charity in the future. (Please check out the links below to stay up to date!)


I hope you enjoyed this little update!


Blessings and Peace!
Tabitha

Tabi's Creating Adventures


If you would like more information, feel free to connect with me at one of the mediums below:

TabisCreatingAdventures@gmail.com

www.facebook.com/TabisCreatingAdventures

tenacious141b (Instagram)

https://payhip.com/TabiElrod  

07 February 2023

Adventures in Hats

As I have mentioned before, I tend to make things in batches. This time it's hats featuring bulky yarns. I experimented with a couple of different hat constructions and knitting patterns this time around. I especially like the pompom hats (pictured at the bottom) because they have a simple beauty to them.


This hat (above and modeled by Mani below) features a basic cable. Sized for a child, this hat would be a great option for a cozy princess.


On the basketweave kick, this pink beauty is sized for an adult large.  Accented with a knit one, purl one border, the basketweave pattern turned out cozy, too. I will likely make something similar to this one again.


Also, sized for an adult large, this one reminds me of cotton candy. Stockinette is probably my favorite visual texture. There's a reason knit beanies are so popular.


This pastel rendition is identical in pattern to the cotton candy hat immediately above. It's hard to decide which color variation I like better.

This slouchy beanie is sized for an adult large. What makes this hat different from the others is that it is crocheted instead of knit. Inspired by another design I found several years ago, I free-handed a loose, comfy version. I think it turned out pretty good.

While I enjoy making cables and basketweaves, there is something about a simple stockinette that really appeals to me. Even crochet doesn't compare to the simplicity of the stockinette stitch. 
 
I hope you enjoyed seeing this collection of hats as much as I enjoyed making them!

Blessings and Peace!

Tabitha

Tabi's Creating Adventures


If you would like more information, feel free to connect with me at one of the mediums below:

TabisCreatingAdventures@gmail.com

www.facebook.com/TabisCreatingAdventures

tenacious141b (Instagram)

https://payhip.com/TabiElrod

04 January 2023

Adventures in Kid Hats

After working up the blankets for my friend's kids, I still had some fuzzy-blue yarn left. So here are three kid-sized hats with three different patterns: simple cable, basketweave, and plain.

The method by which I worked up each of these hats definitely affected the size and overall shape. 

On the first hat, below, the simple cable was knit as a short pattern then joined together like a headband before picking up stitches around one edge to close off the top (with a pom pom). Making the cable pattern wider would have made the hat taller.


The basketweave hat was knit up similarly, with a slightly wider pattern, so you can see the difference that made in the height of the hat. 

Most simple of the three patterns, the plain knit hat is also the largest hat. 


While I certainly enjoyed experimenting with the different patterns and learning what affects hat size, I also have determined that I would like to make more pretty designs in larger sizes. 

I'm not sure where these hats will go, but I am certain that the recipients will have warm heads while they wear them. 

I hope you enjoyed this sampling of hats!


Blessings and Peace!

Tabitha

Tabi's Creating Adventures


If you would like more information, feel free to connect with me at one of the mediums below:

TabisCreatingAdventures@gmail.com

www.facebook.com/TabisCreatingAdventures

tenacious141b (Instagram)

https://payhip.com/TabiElrod

11 December 2022

Adventures in Kid Blankets

Welcome back, Merry Christmas, and Happy New Year! 
 
I made two blankets recently, and I am pretty happy with how they turned out. Normally, I would say that there are more than enough blanket makers to make the world go 'round, but these were inspired by the idea of play. Large enough to wrap around a little one, these blankets are still small enough for a little one to handle by themselves.

This beautiful variation of mermaid colors is a play blanket for my friend's toddler girl. I took a variegated pink yarn (without the green and purple) as a border for a bit of color contrast. It should be about the right size to lay on, lay under, or wrap her toys as she sees fit.  I hope she enjoys this colorful creation.

For my friend's little boy, I knit up this fuzzy-yarn blue blanket. The nice thing about novelty yarn is that it is usually very forgiving because of its thick nature. Even though I knit this blanket in a basic garter stitch all the way through it's hard to tell. Even so, I believe it turned out super cozy (even I had a hard time putting this one down)!


As far as design goes, knitting creates a different texture than crochet, so I selected the more smooth texture of knitting in hopes that the blankets will be more pleasant for my friend's kids to hold. Overall, I think both blankets turned out nicely.
 
I hope you enjoyed these little projects!

Blessings and Peace!

Tabitha

Tabi's Creating Adventures


If you would like more information, feel free to connect with me at one of the mediums below:

TabisCreatingAdventures@gmail.com

www.facebook.com/TabisCreatingAdventures

tenacious141b (Instagram)

https://payhip.com/TabiElrod

07 January 2022

Adventures in Socks

 
These lovely socks are a recent completion.  My  husband and I found the yarn at a local yarn store in Washington state many moons ago.  I selected the yarn based on the blue color, not realizing that there was a beautiful purple-pink variation hidden inside.  As an added bonus, the pattern on the socks shows up surprisingly well.  This pattern is definitely a repeatable offense. 
 
I used about half the yarn from the two skeins, so that leaves opportunity for the same colors in another project. Now all I have to do is figure out what I want to do with the rest.  

Blessings and Peace!

Tabitha

Tabi's Creating Adventures


If you would like more information, feel free to connect with me at one of the mediums below:

TabisCreatingAdventures@gmail.com

www.facebook.com/TabisCreatingAdventures

tenacious141b (Instagram)

https://payhip.com/TabiElrod

07 October 2011

Hot Pads Again - October 2011

I wanted to take a break from the projects I have been working on, and since I found the huge bag of yarn for $5 at the church's thrift shop, doodling seemed like a great idea!  I am super excited about these because this is the first yarn I've worked with in a while that actually shows pattern well!  No, seriously, when I post for the hoodie you'll understand why!  Both of these are so super simple I can't even take credit for the patterns.  So, I'll just list the patterns as patterns and say have fun!


Little Squares Trivet
needle size - 9.00 mm
yarn weight - worsted
gauge - 4x4" 12 st x 13 r
finished size - approximately 10 x 10 "

Using yarn from two skeins (or balls) of yarn, cast on 31 st.  (I used one variegated and one solid.)
Knit 8 rows in garder stitch.  (There should be 31 stitches in each row.)
Set 1:
Row 1: k5, p3, k3, p3, k3, p3, k3, p3, k5
Row 2: k8, p3, k3, p3, k3, p3, k8
Row 3 and 4: repeat row 1 and 2
Set 2:
Row 5: k8, p3, k3, p3, k3, p3, k8
Row 6: k5, p3, k3, p3, k3, p3, k3, p3, k5
Row 7 and 8: repeat rows 5 and 6.

Repeat sets 1 and 2 until approximately 8 3/4" long.
Knit 8 rows in garter stitch
** Last 2 stitches of last knit row, leave on needle:
    Handle: k2, turn
        repeat until there are 10 to 12 rows of handle.  Cut yarn (at least 3"),
        (with tapestry needle) sew handle to body, tie in ends.


Diamond Trivet
needle - 9.00 mm
yarn weight - worsted
gauge - 4x4" - 12 st x 20 r
finished size - approximately 15 x 20" (by diagonals)

Note 1: can make this pattern shorter by using fewer rows.  End on even row.
Note 2: I changed colors on this one because I ran out of maroon yarn.

With yarn from two skeins (or balls) cast on 2 st.
Increasing:
Row 1: inc 1, knit to end, turn  (3 st)
Row 2: inc 1, knit to end, turn  (4 st)
    repeat to row 6  (8 st)
Row 7: inc 1, k2, p1, k4, turn  (9 st)
Row 8: inc 1, k to end, turn  (10 st)
Row 9: inc 1, k2, p to 4 from end, k4, turn  (st in row = row # + 2)
Row 10: inc 1, k to end, turn (st in row = row # + 2)
    repeat rows 9 and 10 until there are 50 stitches on one needle (end on even row # 48).
    (can change yarn here)
Decreasing: 
Row 1: k2tog, k3, p to last 4, k4, turn  (49 st)
Row 2: k2tog, k to end, turn (48 st)
    repeat rows 1 and 2 until there are 2 st on needle.  (decreased st by one on each row)
Last row (without handle): k2tog, cut yarn (3-4"), tie in ends.

Optional handle:
Last row is first handle row: k2, turn
    repeat until there are 10 to 12 handle rows, cut yarn (3-4"), sew handle to body
    (with tapestry needle), tie in ends.

30 September 2011

Scarf, A Side Pattern - Sept 2011

The whole purpose for this scarf was to use some yarn I found at the church's thrift store.  The pastor's wife wanted to have a thrift store for a long time and finally opened it about a year ago.  People bring in donations, she sorts through them, prices them, and sells them to people who come in looking for stuff.  She has mostly clothing, but also a lot of other stuff, too.  I happened to come in at the right time to buy this partial skein, from her, then later a lady donated a big bag of yarn (which I also bought for $5!) and knitting needles... needless to say I have more yarn and knitting needles than I know what to do with!  Now if only I could find enough crochet hooks and Tunisian crochet hooks to finish those sets!  (I'm still missing a few sizes of knitting needles, but I have soooooo many I don't know what sizes I'm actually missing yet!)


This is a pattern I found in one of my Knitting Made Easy books (I only have two).  It's super simple!  But since I don't want to copy write the pattern, I'll cite the book!

Knitting Made Easy
Beginner Basics, Illustrated Stitches, Updated Techniques
Featuring Red Heart Yarns - www.redheart.com
Distributed in the USA by Coats and Clark, Greer, SC 29650 

Blessings and Peace!

30 June 2011

The Pattern Was Cute - Baby Blankets (2010)


Completely useless to me for now (hopefully soon), these baby blankets were inspired by the book I mentioned earlier, Knitting Made Easy by Red Heart.  On page 31 of this inspirational book, there is a picture of the most adorable baby pose ever!  And this adorable little baby is strategically positioned with a cute purple/pink baby blanket.  The first blanket was an attempt to understand the pattern, so I used two different colors of yarn and alternated them.  The second blanket was an attempt to make the blanket better.  Overall, they turned out all right... though I wish I could have made both blankets a little more square.

Since I wanted to get back into knitting and do something more than just a scarf, I started here!  Believe it or not, this was *before* the scarves in the scarves post, but not by much.

~Pattern:
-4 skeins of medium weight yarn in your desired color and size 11 (8 mm) knitting needles.
-Increase (inc) - Knit in the front loop of the next stitch as usual but leave it on the left needle, then knit into the back loop of the same stitch and slip off the left needle - two stitches made from one.
-S2KP - Slip the next 2 stitches from the eft needle purlwise.  Knit the next stitch, then pass the 2 slipped stitches over the knit stitch - one stitch made from 3.

Blanket's First Half

*Cast on 3 stitches.
*Next row: knit.
*Row 1 (right side): increase in first stitch, knit to last 2 stitches, increase in next stitch, knit 1 (2 stitches increased)
*Row 2: Purl.
*Row 3: (right side): increase in first stitch, knit to last 2 stitches, increase in next stitch, knit 1 (2 stitches increased)
*Row 4: Knit.

Repeat Rows 1-4 for pattern until there are 131 stitches, end by working Row 4.  Each "leg" of the triangle should measure 37".

Blanket's Second Half

*Row 1: slip 1, knit 1, pass slip stitch over, knit to last 2 stitches, knit 2 stitches together (2 stitches decreased)
*Row 2: Purl.
*Row 3: slip 1, knit 1, pass slip stitch over, knit to last 2 stitches, knit 2 stitches together (2 stitches decreased).
*Row 4: Knit.

Repeat Rows 1-4 for pattern until 3 stitches remain.

*Next Row: Purl.
*Last Row: S2KP - 1 stitch remains.  Fasten off.  Weave in ends.


Hope you enjoyed!

And Then There Were Scarves... (2009-2010)

1.


2a.

2b.

3a.

3b.

4a.

4b.


All right!  Scarves!!  These are great for cold winters!  Fortunately Someone was thinking in advance when I made them... and obviously it wasn't me.  Scarves are easy to make and completely impractical in West Texas, a desert.  Even in the winter it rarely gets cold enough to worry about scarves.  Hats, maybe, and medium-weight coats sure, but scarves, nahhh... most do without and are perfectly content!

1.  For the first scarf, it was made from the same type of yarn as the beanie-toboggans, only in a different color.  Very thick, kind of wavy yarn.  Though I have since lost the original skein papers, I have found similar yarn since.  A good yarn to use now would be Lion Brand Yarn, Homespun, 98% acrylic, 2% polyester, net weight of 6 ounces, 185 yards / 169 meters, bulky, recommend size K - 10.5 crochet hook or 10 (6mm) knitting needles.

The pattern is very simple.  Single crochet to your hearts content!  About 22 to 25 stitches across for about 150 rows should make a nice sized scarf.  Like I said, very simple.

2-4. I don't know what kind of yarn I used because it doesn't have any paper labeling and I've never used anything quite like it before.  Plus, it came on a spool.  It's a little lighter than medium weight and works well with size H (8 - 5mm) crochet hook or size 8 (5mm) knitting needles when using a single yarn.  There are notes for doubling the yarn below.

2. The second scarf was knit from a knitting book that I found.  *Knitting Made Easy* by Red Heart yarn company has beginner basics, illustrated stitches, and updated techniques.  With 9 patterns in this book, this pattern, a beginner level, is on page 19 and is called "On the Double Scarf."  Since I do not see a copyright, I'll go ahead and include the pattern here.

Pattern: recommends 2 colors of medium weight yarns knit together, I only used one yarn so my project is very small compared to what they recommend.
*Cast on 20 stitches.  Knit 8 rows.  Work in pattern as follows:
*Row 1 (right side): knit.
*Row 2 and 3: Knit 4, purl 12, knit 4.
*Row 4: knit.
*Repeat rows 1-4 for the pattern until the scarf is about 52 inches from beginning, then end by working Row 4.  Finish the pattern by knitting 8 rows.  Bind off.  Weave in ends.

3. Completely double crocheted.  That's right, nothing fancy, about 20 stitches per row and long enough to make a scarf!  It was nice to do something so easy after concentrating so hard on the knitting!

4. This scarf was made by crochet starting in the middle and working my way out.  It would work well with a size N (9mm) crochet hook with two strands of yarn from two skeins or balls.  The first step is 92 double crochet stitches.  Then, once those 92 stitches are on, use the end stitches as a base to double crochet 3 stitches thus making the ends.  The 3 double crochet stitches are the first rows of each end.  Now, in rounds, double crochet one-for-one until you get to a corner.  Each corner will had 2 double crochet stitches and 2 chain stitches to make the scarf flat.  There should be a total of 5 countable rounds to make the scarf.

So... the pattern might look something like this (note: the initial "chain 3" counts as the first double stitch of the round):
*Chain 92.
*Row A: double crochet 92 stitches.
*Round 1: chain 3, double crochet 2, chain 2 double crochet 90, chain 2, double crochet 3, chain 2, double crochet 90, chain 2, connect with slip stitch.
*Round 2: chain 3, double crochet 4, chain 2, double crochet 92, chain 2, double crochet 5, chain 2, double crochet 92, chain 2, connect with slip stitch.
*Round 3: chain 3, double crochet 6, chain 2, double crochet 94, chain 2, double crochet 7, chain 2, double crochet 94, chain 2, connect with slip stitch.
*Round 4: chain 3, double crochet 8, chain 2, double crochet 96, chain 2, double crochet 9, chain 2, double crochet 96, chain 2, connect with slip stitch.
*Round 5: chain 3, double crochet 10, chain 2, double crochet 98, chain 2, double crochet 11, chain 2, double crochet 98, chain 2, connect with slip stitch.
*Work ends into scarf.

I guess that's it for these guys.  I'll catch you on the next post!  Hope you enjoyed!

23 June 2011

Humble Beginnings

In the beginning there was crochet.  Later knitting and sewing were added.  Little do I know about tatting, but that is not in my "bag of tricks," so to speak.  Now I would like to share with you my adventures in crocheting, knitting, and sewing.  I'll start with the beginning and hope I remember most of it.

My origins in yarn work started with my mom and my great-grandmother teaching me the basics when I was old enough to hold a crochet hook... maybe 6 years old.  My first crocheted project was a multi-colored blanket that was completely uneven on the sides.  I don't remember much else about the early years, except for the fact that my tension was inconsistent and I had two teachers.

Knitting came when my mom tried to learn to knit herself.  She bought a beginners book, a set of knitting needles, and some yarn.  After some time (a couple of weeks) and she still couldn't get it she expressed her frustration and threatened to throw the stuff out!  I asked if I could try and she said yes, gave me the book, needles, and yarn, then told me to go away.  30 minutes later, I came out of my room with a little knitted square.  Needless to say, Mom was not happy, not that she wasn't impressed, she just wasn't happy that she couldn't get it and I could.

Sewing was a different adventure.  I learned how to use a sewing machine's "go" pedal and "back-up" button.... and that was about it.  Sewing on a button was natural and required little to no explanation, so that is all I remember.  My first sewing "projects" were "handkerchiefs."  I don't know that they actually came out very good at all... but we all have to start somewhere!

Now, to begin my search for the beginning projects I still have and upload pictures!!

Blessings,
Tabi